


Inserting a signature image into a PDF by rebuilding the PDF in Power Automate
This solution solves the scenario described in Inserting a signature image into a PDF.
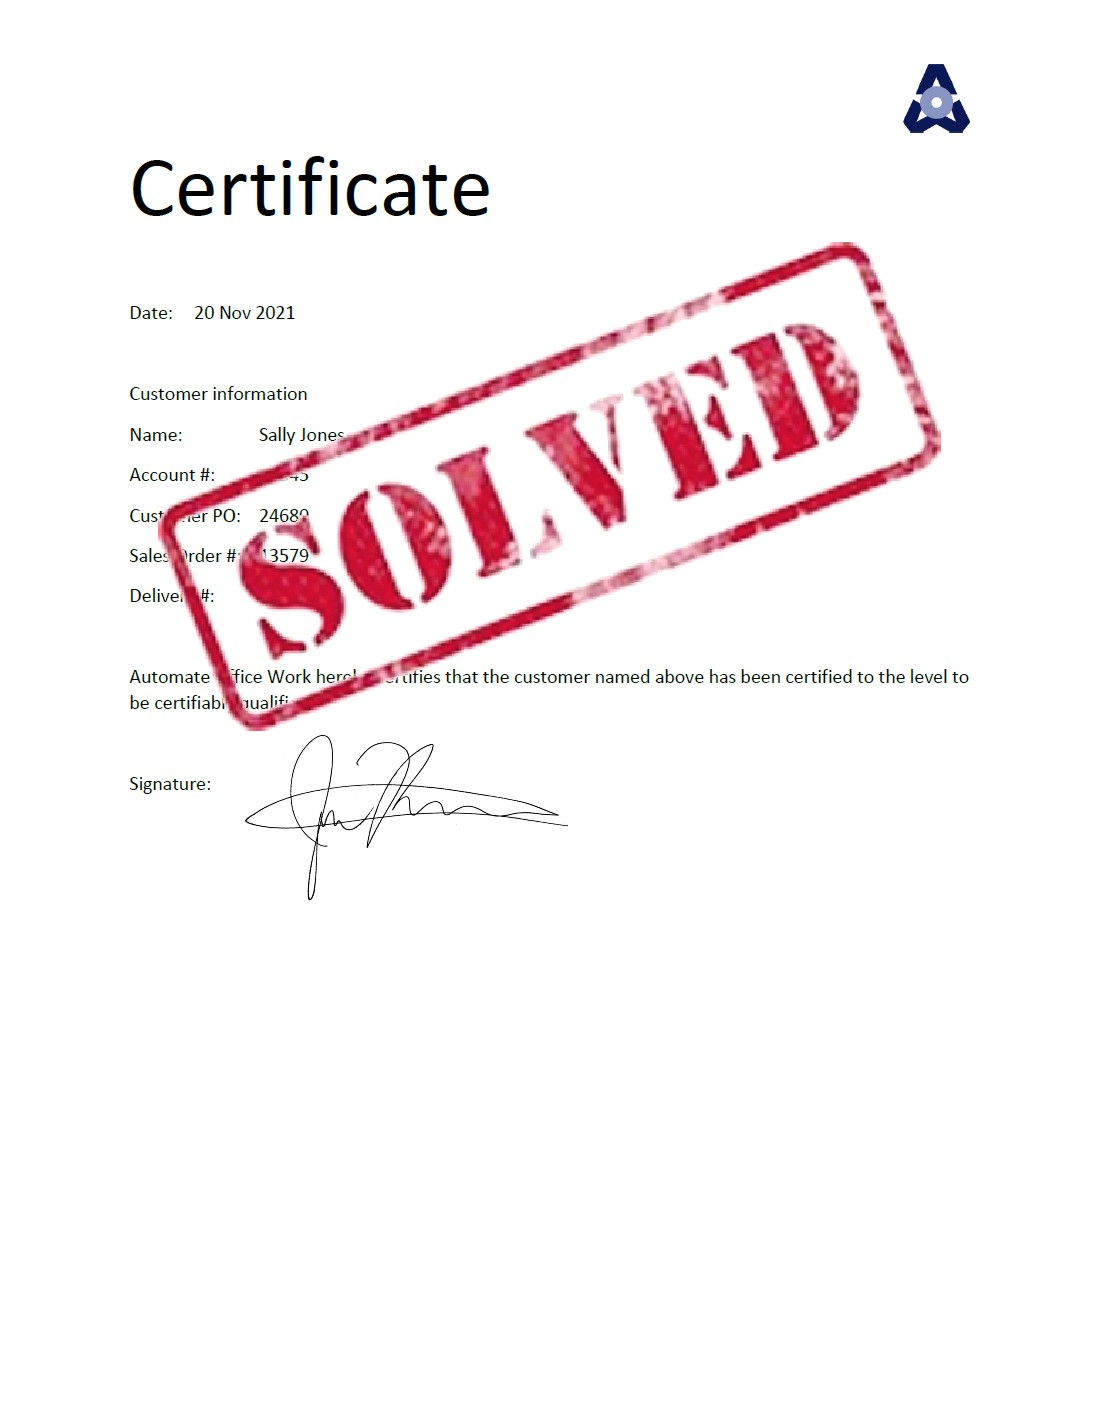
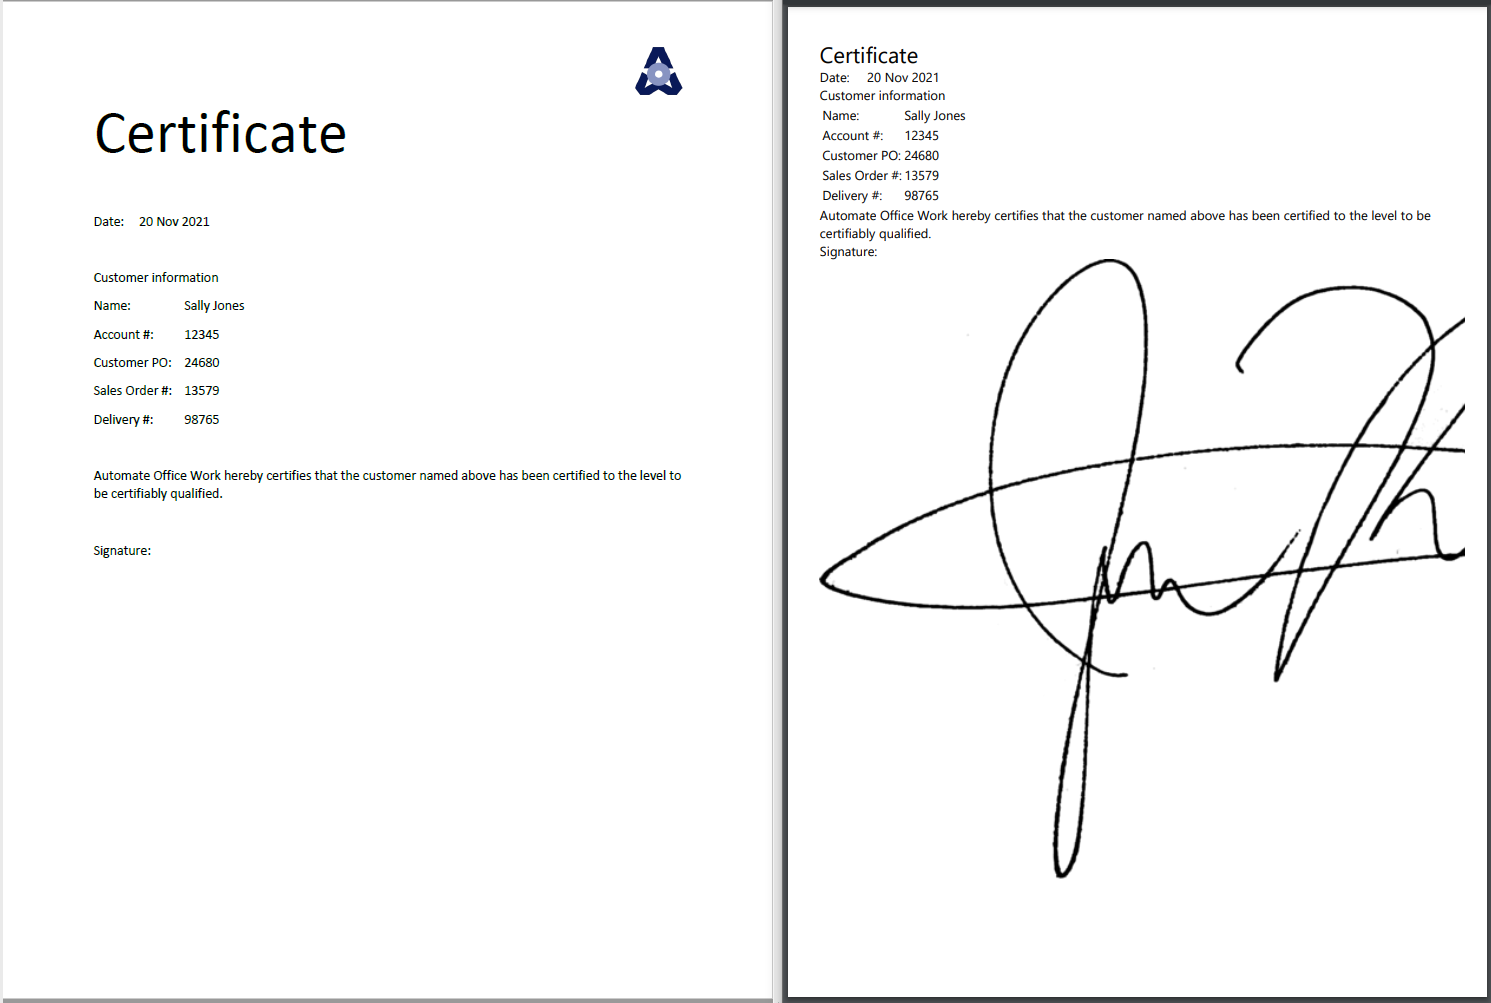
We will automatically insert a signature image into a PDF by using the method of extracting text from a PDF, rebuilding the page as an HTML web page, inserting the signature, and converting it to PDF. Below you see our original PDF on the left and the signed PDF on the right that this project will automatically generate.

We will use Microsoft Power Automate to listen to our emails and to run this automation. If your company uses Office 365 and Power Automate is in the scope of your license, you can simply go to https://flow.microsoft.com and follow along.
Building the automation
First we go to https://flow.microsoft.com, sign in, and click on "My flows" > "+New flow" > "Automated cloud flow".
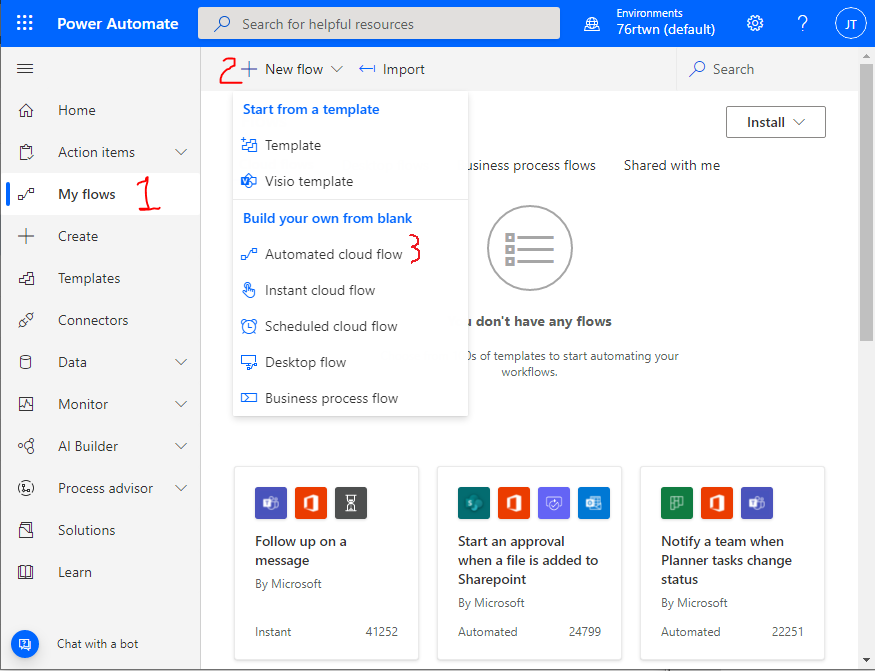
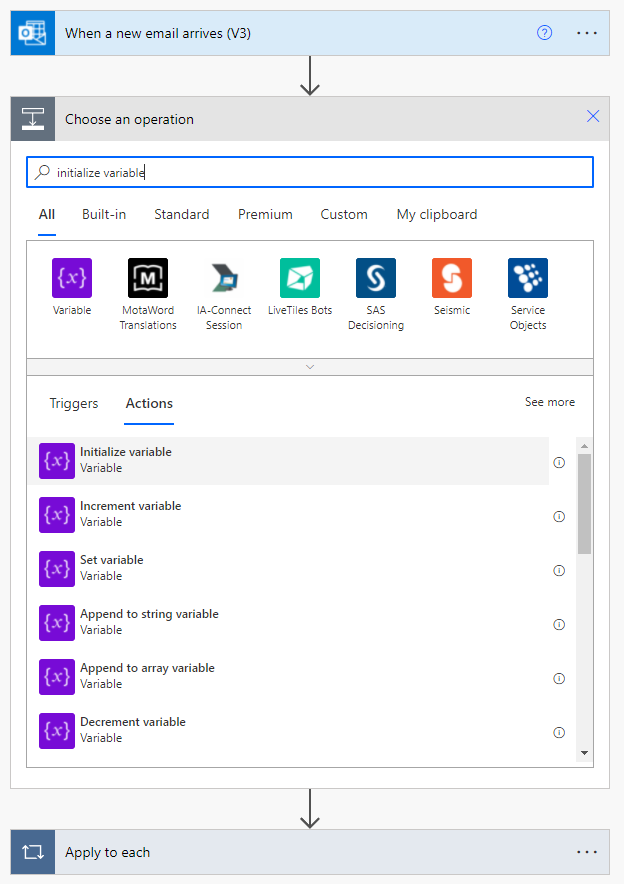
The trigger is "When a new email arrives (V3)" in the connector Office 365 Outlook. Indicate the folder you will be listening for new emails (inbox below). You can specify specific people who will send the emails to listen for. We will be working with attachments so "Include attachments" should be marked as "Yes" and "Only with attachments" should be marked as "Yes" since we only want to analyze emails that have attachments. I will further filter mine to only those emails that have "new certificate" in the subject line. That's it for the trigger.
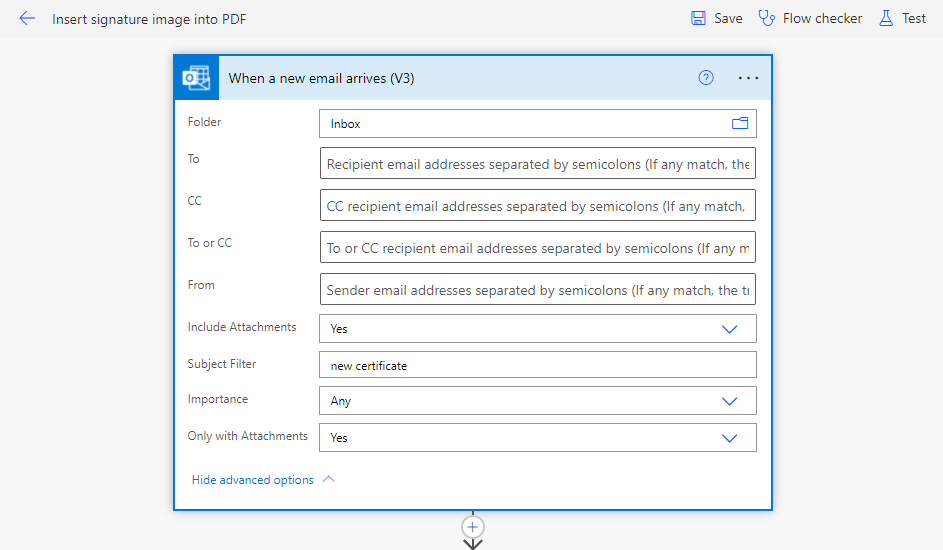
Next we add the "Apply to each" action. We indicate that we will go through each of the Attachments in the email that we received. Inside the "Apply to each" action we add a "Condition" action.
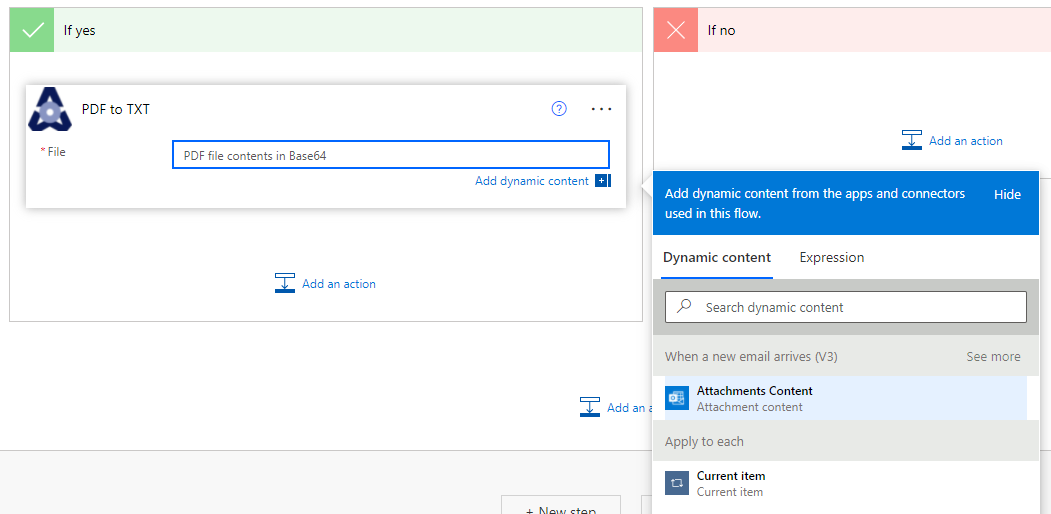
In the Condition action we test to see that the name of the attachment is "certificate.pdf". Only if this test is true, then we go forward.

In the "Yes" branch, we add a new custom action that we created to extract text from a PDF. You can read about this at Create custom action in Power Automate. This action is now available in the "Custom" tab when I add a new action.
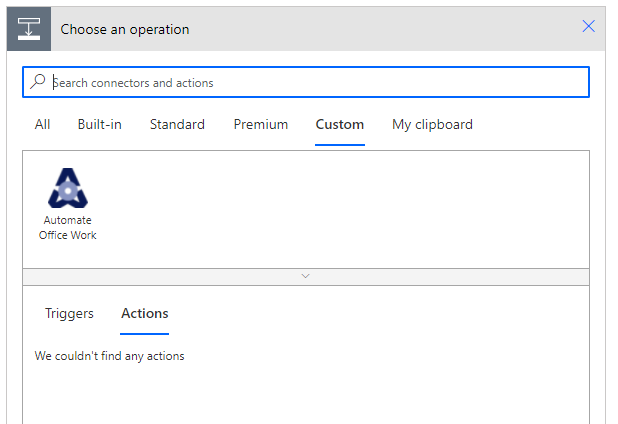
When I select my "Automate Office Work" connector, I now have "PDF to TXT" in the list of Actions. We select this action.
For the "File" variable of this action, we go to our "Dynamic content" panel and select "Attachments content". This will pass the content of the attachment we are analyzing to our custom action.
If we save our flow now and send an email to ourselves with a PDF attached called "certificate.pdf" and include in the subject "new certificate" like shown below, the flow will run.
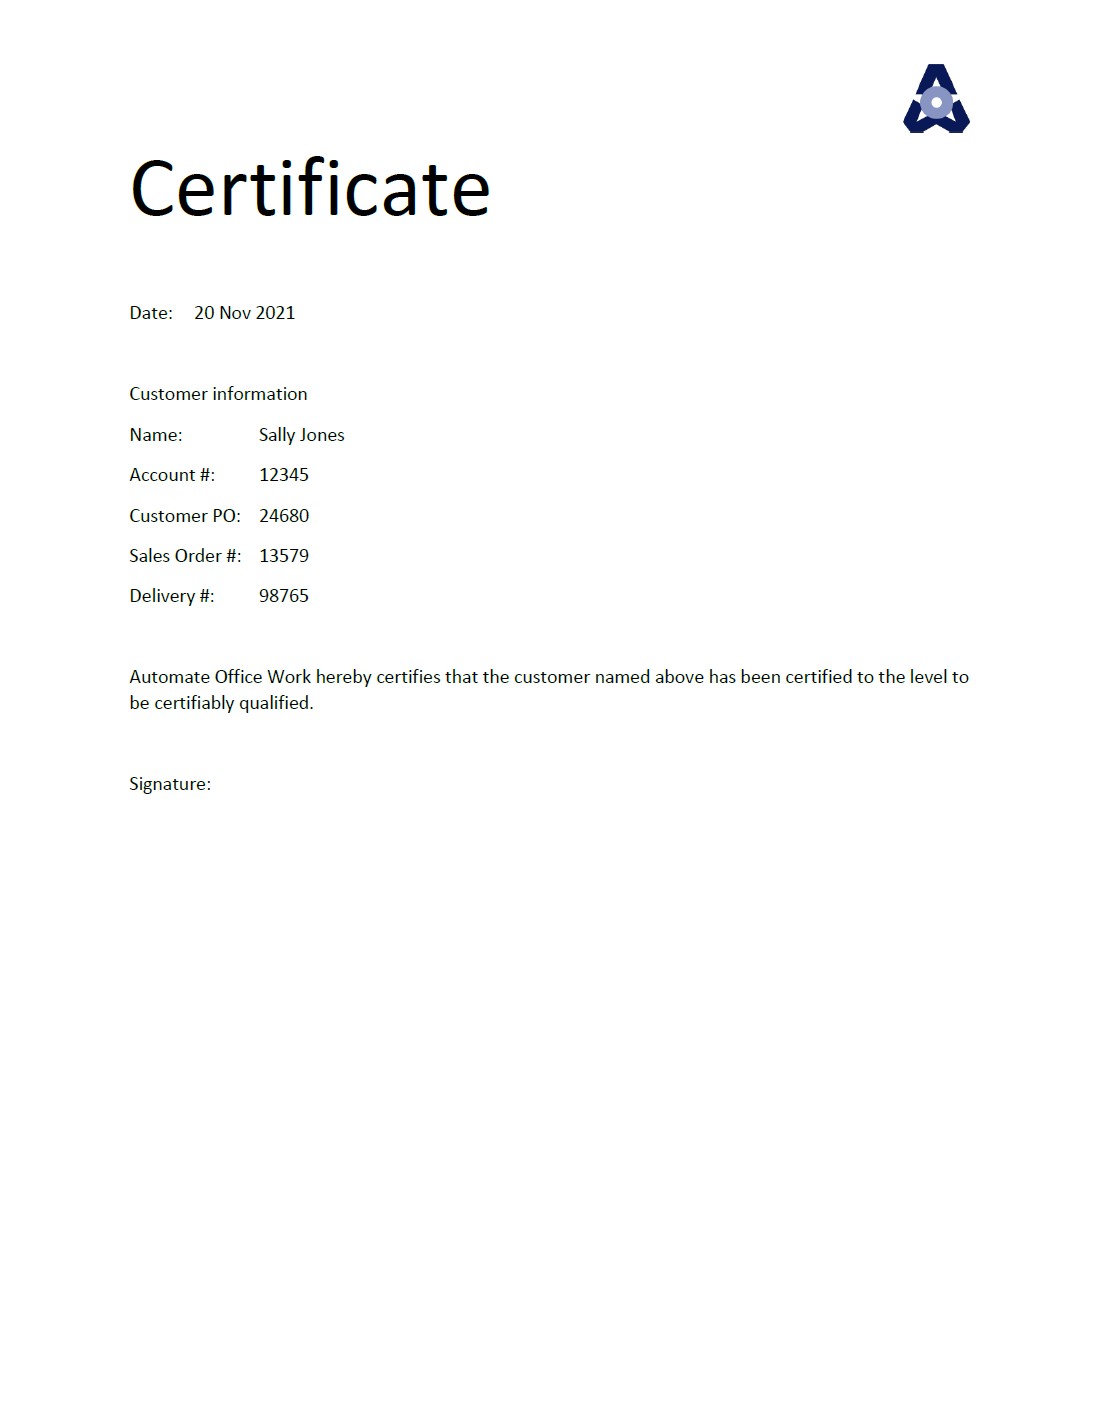
The string returned in the output of this action is:
"Certificate\t \t\n \nDate:\t \t20 Nov 2021\t \t\n \nCustomer information\t \t\nName:\t \tSally J\tones\t \t\nAccount #:\t \t12345\t \t\nCustomer PO:\t \t24680\t \t\nSales Order #:\t 13579\t \t\nDelivery #:\t \t98765\t \t\n \nAu\ttomate Offic\te Work hereby \tcertifies\t that the customer \tname\td above has been certified to the level to \t\nbe certi\tfiably qualified.\t \t\n \nSignature:"
The \t means a tab and \n means a new line. Next we can split this string at the \n (new lines) and then loop through our new array of lines.
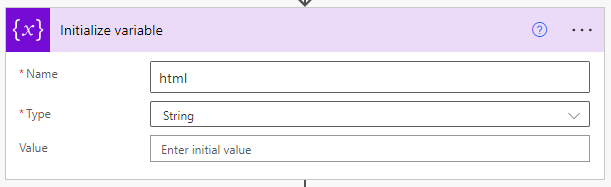
Now is a good time to set up our variables we need for building our HTML page. Variables must be initialized before you can use them and they must be initialized after the trigger and before any looping or conditional testing. So after our trigger we add an action to "Initialize variable".
We give our variable the name "html" and type "string". The value can be left blank.
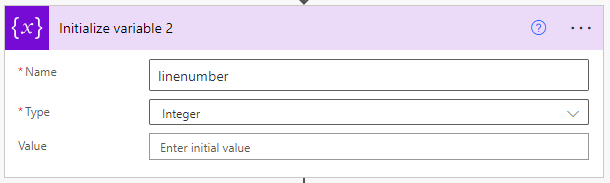
We also initialize another variable, but this one is an integer named linenumber.
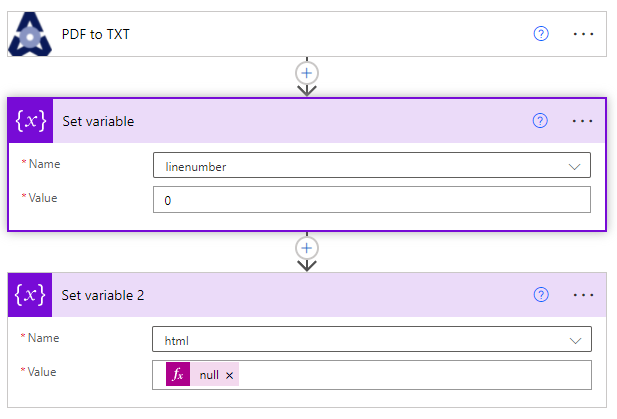
Now just after our "PDF to TXT" action we can set the linenumber variable to 0 and our html variable to null. Null is entered as an expression since you can't set a variable to blank. Setting these variables is also necessary if your email has more than one attachment thus the flow would be looping multiple times so we would need to reset these variables.
Next we add a "compose" action. The value of the input is an expression where we use the "split" function. The split function is in the form: split(string, string to split by). So below our string is the body value from the PDF to TXT action (conveniently shown below in the panel so you can just click on it to insert it into the split function. We will be splitting where the "\n" is found in our string so we split our extracted text from the PDF at each line. Thus the full expression is: split(outputs('PDF_to_TXT')?['body'],'\n')

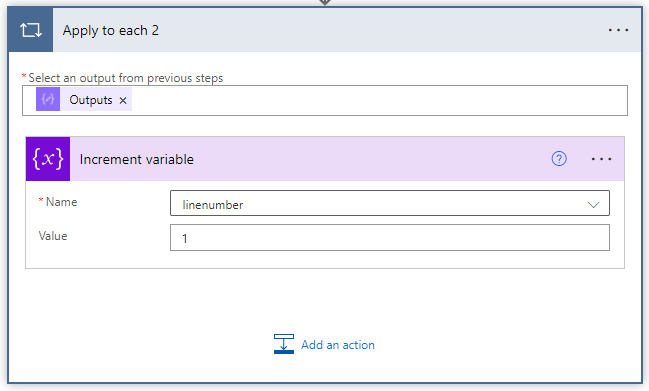
Next we do another "Apply to each" action, so this one by default will be called "Apply to each 2". The output we will be looping through is the Outputs value from the Compose action. Because we split on the new lines of our string, we now have an array where each line is an element of the array. So this action will loop through each of the lines.
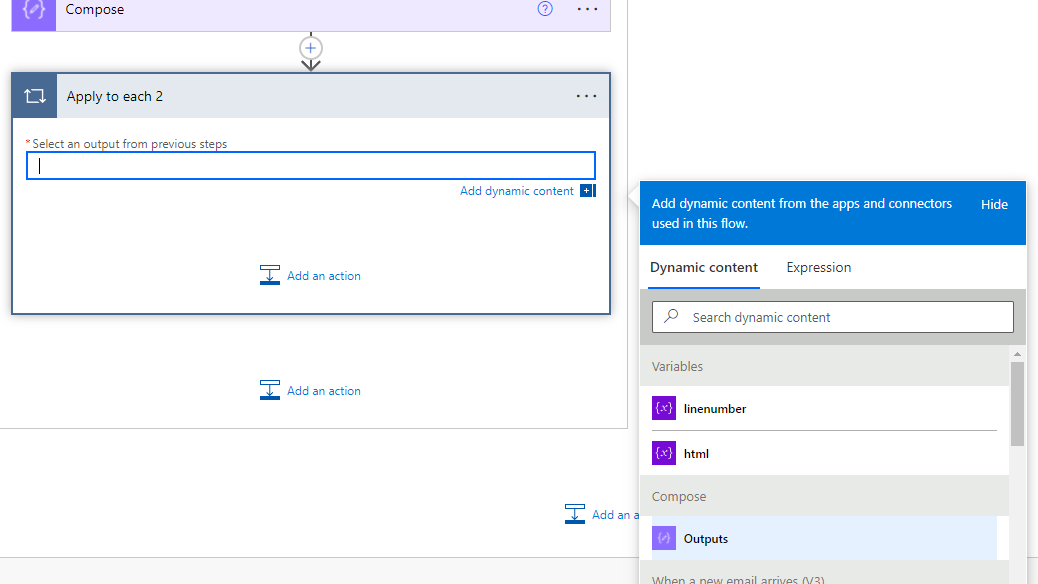
Inside the Apply to each 2 action we add the action Increment variable. We increment the linenumber variable by one with each loop.
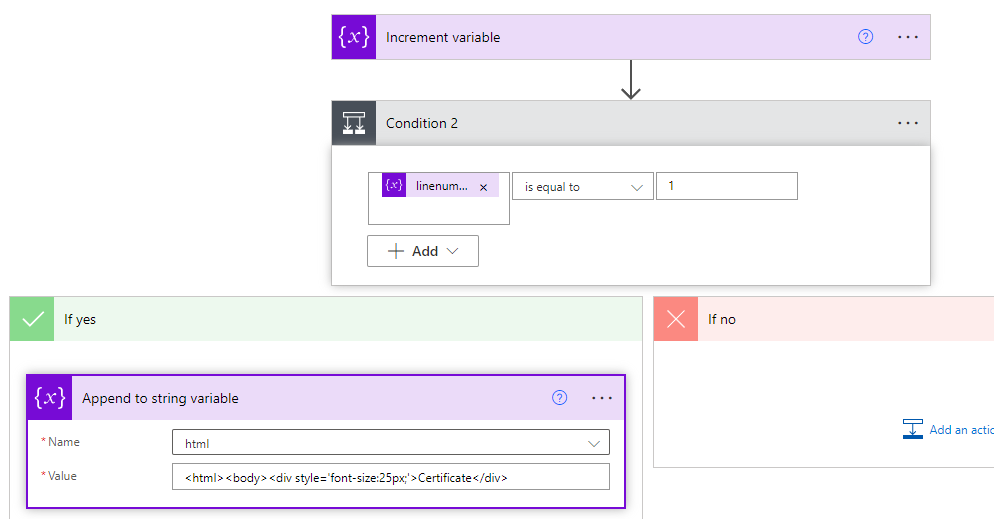
Next we do a series of conditional tests depending on which line we are looping through. We add our first Condition action in this series. If linenumber is equal to 1, then we use the "Append to string variable" action to add our first HTML code to the html variable.
Our next condition checks whether the linenumber is equal to 3. If yes, then we make a Compose action that splits the current line at the \t (tab) symbols. We only want element number two in this array. Remember that arrays start with the first element being number 0. This isolates the date in our line in the example PDF. We then append to the html variable the HTML to create a line that says "Date: " and then the date that we captured.

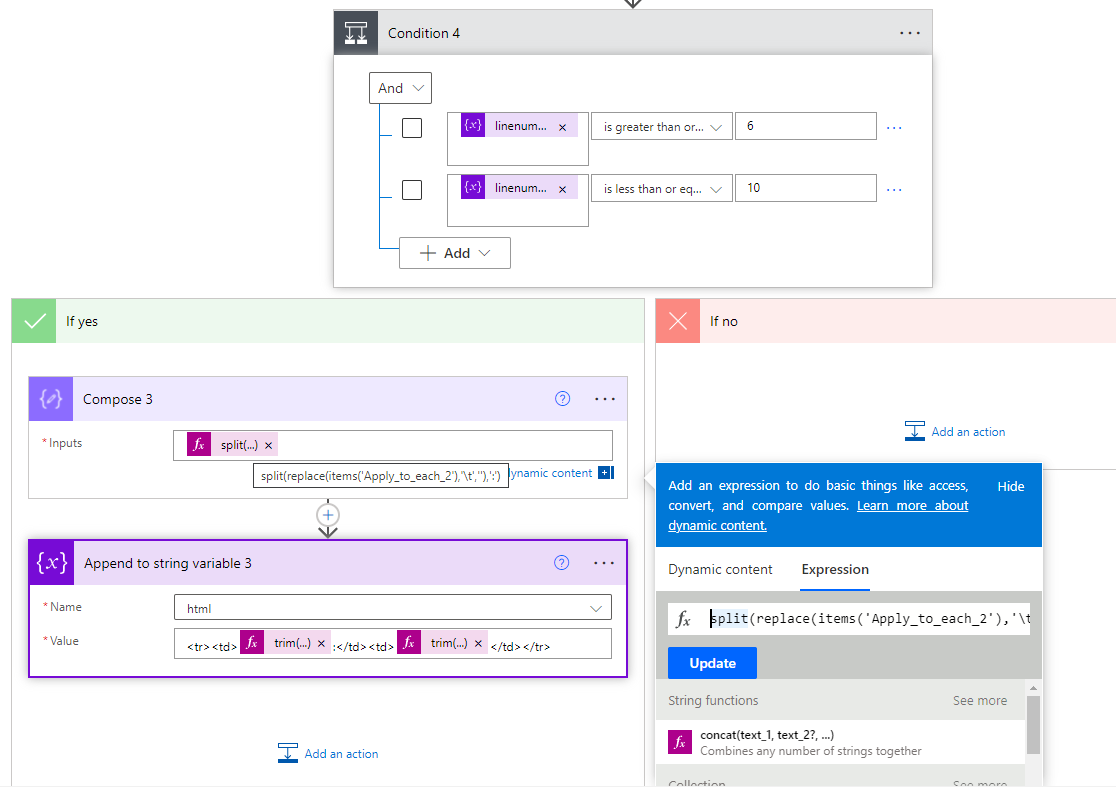
Our last Condition checks if the line is number 6 through 10 and works for any of these lines. We add a Compose action that removes all tabs from the line and splits it at the colon. Then we append a line in our HTML table, the first cell being the first word in our line that was before the colon. Then we have another cell in our table with the value that was after the colon in our line.
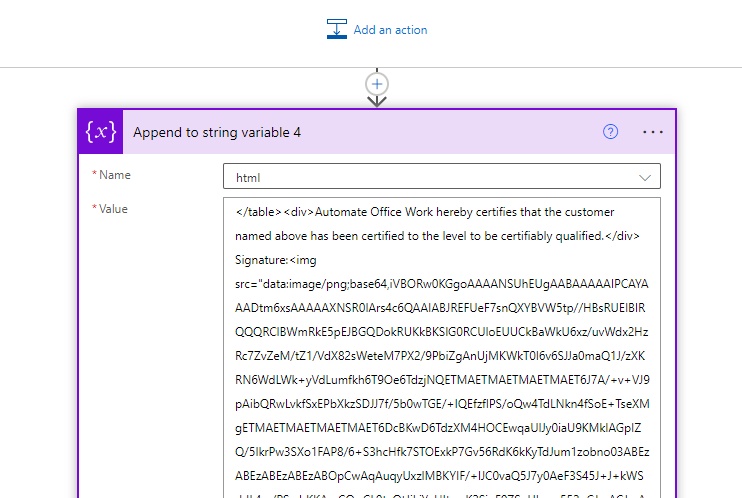
We then get out of this inner loop where we were analyzing the lines because our analysis is now done. We append the final HTML code to our html variable. Notice this is where we insert our signature image. We insert the data for the image directly into the HTML. To get this very long Base64 code for my image, I went to a web site that will convert an image to Base64 and it gave me the below Base64 code.
Next we create a new HTML file in One Drive. You select the folder where you want to save this. / is the root folder. Give your file a name that ends in .html. The file content is the html variable that we built. Next use the Convert file action. The file is identified with the ID if the file that we just created. You can select it in the Dynamic Content panel. The target type is PDF.

The last action we have to do is to put the PDF somewhere for our next action. You could save this "signed" PDF into a SharePoint document library where our user can then click an "Approve" button to show that they approve it and to send for further processing. Below, I will just email it to myself. I could then manually forward it to the next person for processing for the purposes of this demo.

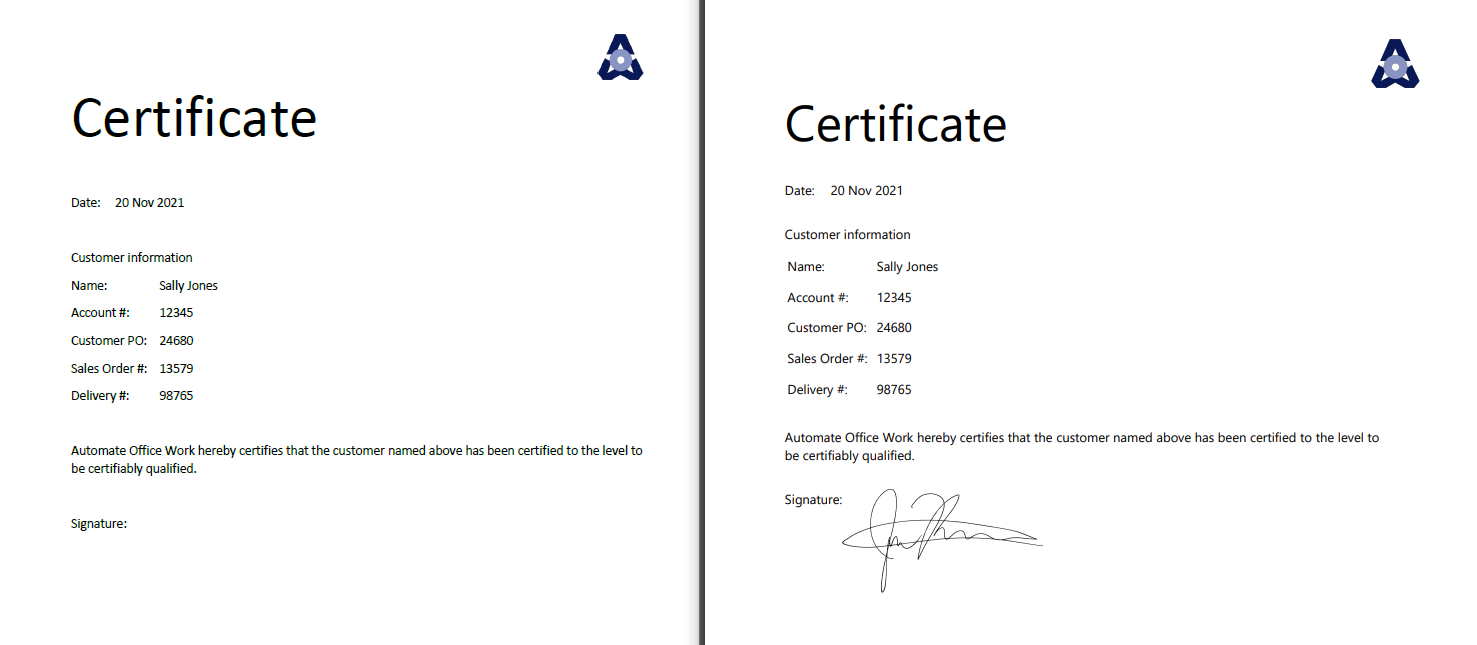
I emailed the certificate PDF to myself for testing and received the signed PDF by email 30 seconds later. Original unsigned PDF on the left, our signed PDF on the right. You can see we have captured all the correct data and the signature is inserted. We just need to add some CSS styling to our HTML to create the right look and feel and resize our signature. We could also insert our logo in the same way we did the signature by converting it to Base64 and inserting the image data.
I adjusted the styling and got what I think is close enough for this demo.
Now that you know how to do this level of automation with PDF's what other kinds of project can you imagine? Something where you automate processing of PDF forms that you receive by email all the time? Let me know in the comments below. -Justin


