


Installing Template Library for Outlook

Alright. So you bought the code offered for sale on PayHip after ensuring that your SharePoint has Modern Script Editor turned on and you are able to display custom HTML pages as outlined at https://automateofficework.com/modern_script_editor.
Installing the code so you can install it in Outlook requires the following steps:
In SharePoint
Create a SharePoint document library that will be your repository for all your document template files. You may wish to create a new SharePoint for this to keep it separate from other SharePoint projects since a single SharePoint has a maximum of 30 million files. I chose to create a daughter SharePoint under my Legal SharePoint. I created it at https://automateofficework.sharepoint.com/sites/legal/templates. Then in this SharePoint I created a document library called Templates. In this Document Library I started building my tree of folders where my templates will go.
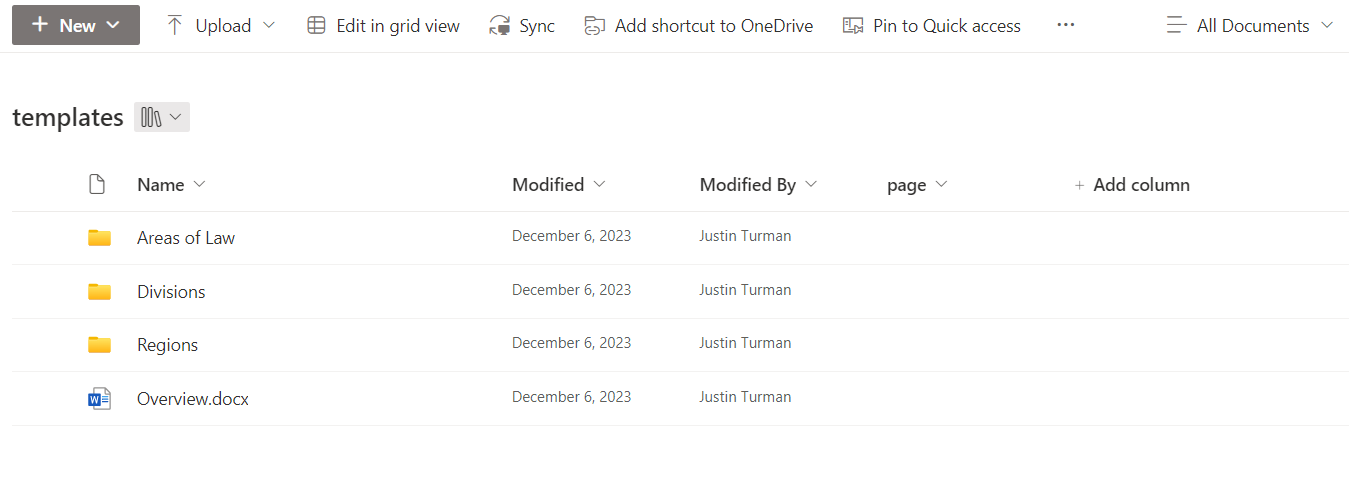
You control permissions to the files here. Give read access to everyone in your department. Give ownership access to team folders to team owners. Team owners can then give edit access to members of their teams. I recommend creating a Word document called Overview where you train people on this tool.
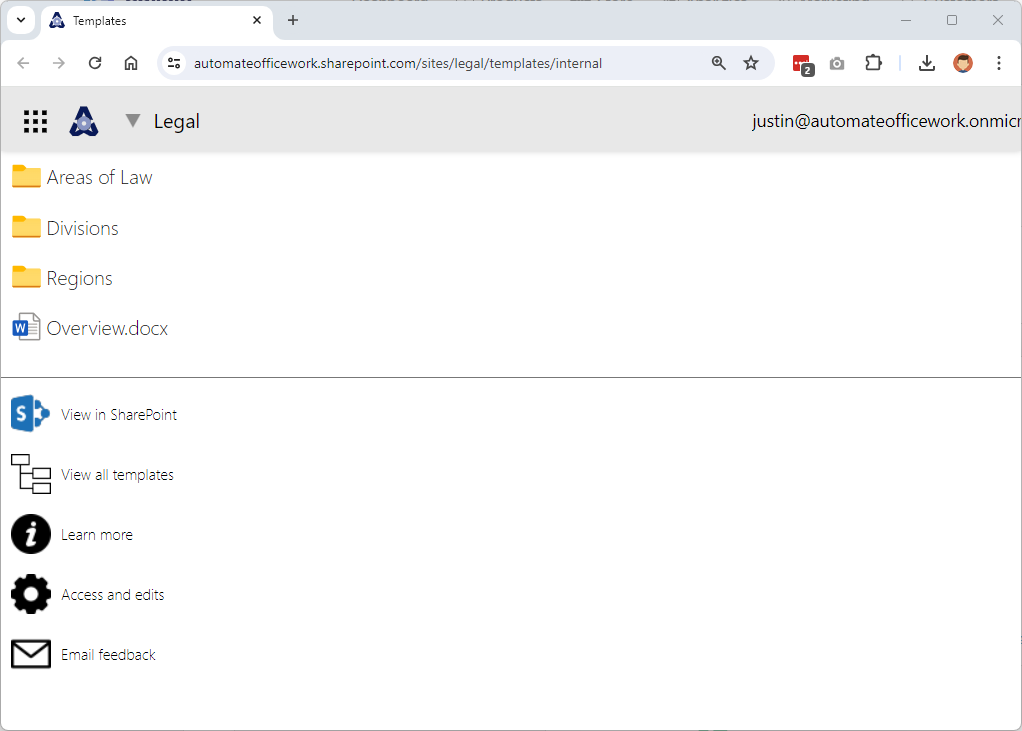
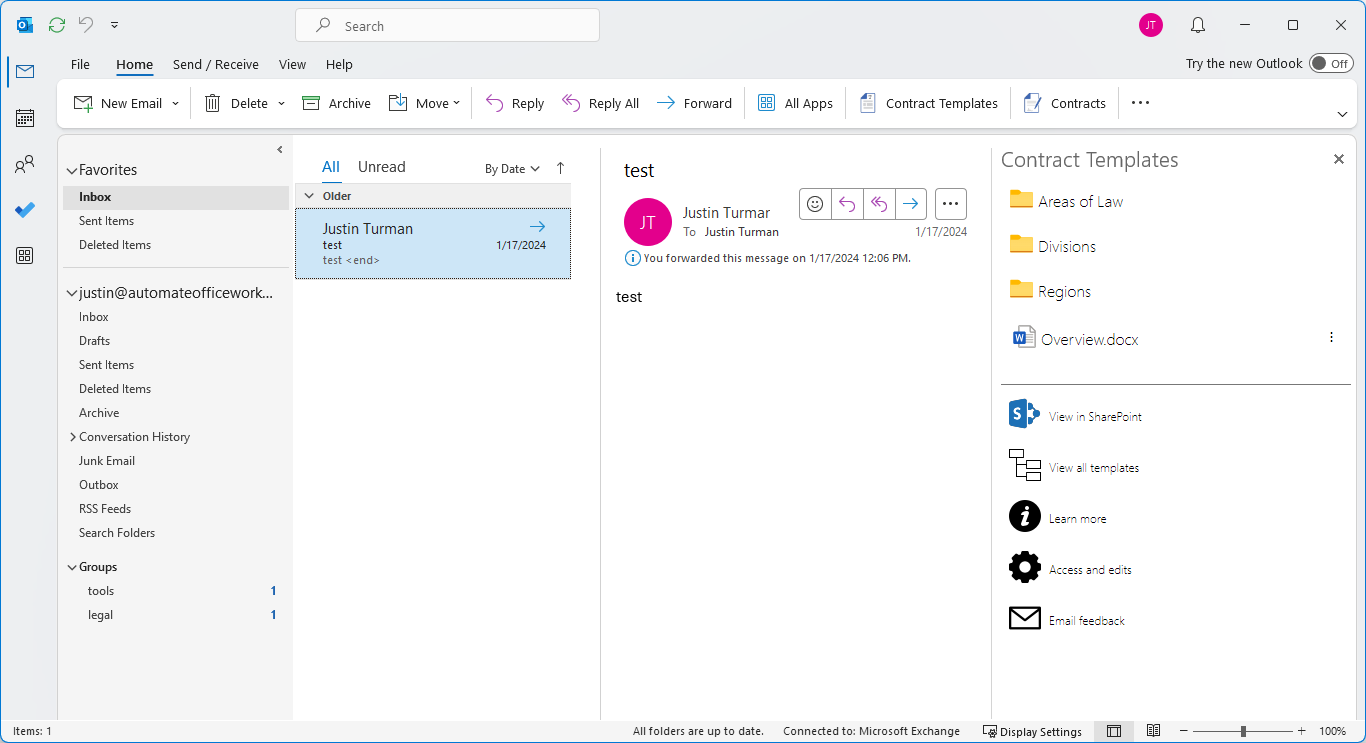
Next you need to create another SharePoint document library where your users will see the tree of folders to interact with the template in read-only mode on SharePoint. I created my document library for this at https://automateofficework.com/sites/legal/templates/internal. This makes is so your normal business users can go to /sites/legal/templates to see information for them about templates. But then your department can see the Outlook tool on SharePoint if they choose to. Notice in the Template Library there is a menu below and one of the options is to View in SharePoint. The page for "View all templates" is inside the Overview folder.
Inside this new "Internal" document library, place the files from the SharePointInternal folder. This is a default.aspx file and an "overview" folder with another default.aspx file inside that. In the first default.aspx file you will need to replace "https://automateofficewor.com/outlook" with the URL of your own public facing server you will be creating below. Do the same for Overview default.aspx file. Plus in this file on line 71 you need to replace "/sites/legal/templates" with the address of your own SharePoint (not the document library) and "/sites/legal/templates/templates" needs to be replaced with the address of the document library you created where the templates are actually stored.
In Power Automate
Next we need an automation so that Outlook can call a URL and receive a list of files in a specific folder from your SharePoint. Power Automate will create this URL for us. Take the PowerAutomateFlow.zip that was included in the files. Go to https://powerautomate.com.
Log in if needed. Click on "My flows" in the left navigation. Click "Import" near the top > "Import Package (Legacy)". Upload PowerAutomate.zip included in the files. Wait a moment for Power Automate to be ready to import the automation. You will see some errors that you need to fix, like switch the account that will be used to run the automation. Instead of my account (justin@automateofficework.onmicrosoft.com) you will need to connect to your own account. Click "Import".
Now when you click on "My Flows", you should see a flow called "Get Templates b755". Click on its name to see its overview page. You'll see here in the future a history of every time the flow has run. Now you can click on the Pencil at the top to edit the flow.
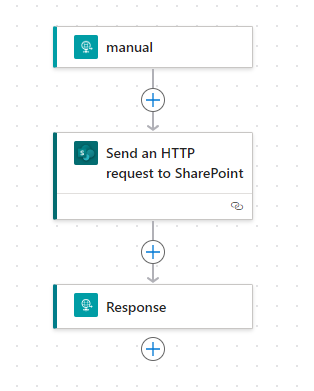
As shown above, this flow has three steps. The first is the trigger, which is when someone visits a URL. This trigger requires a Premium License in Power Automate. The account running it must request a 90 day free trial from Microsoft (which can be renewed multiple times as of the writing of this article) or you must ask your Admin to purchase the Premium License for you. This costs around $15 per month, though your price may vary and Microsoft may change licensing structures in the future. Click on this first step and a panel opens on the left side showing you the details. We are interested in the unique URL created for you. Note this URL since we will use it in the future. I recommend notifying the first 4 characters of your URL and appending them to the name of the flow. You can click on the name of your flow at the top of the page to edit the name. So if you ever see an error for a random URL not working, you'll be able to find the flow that caused the error.
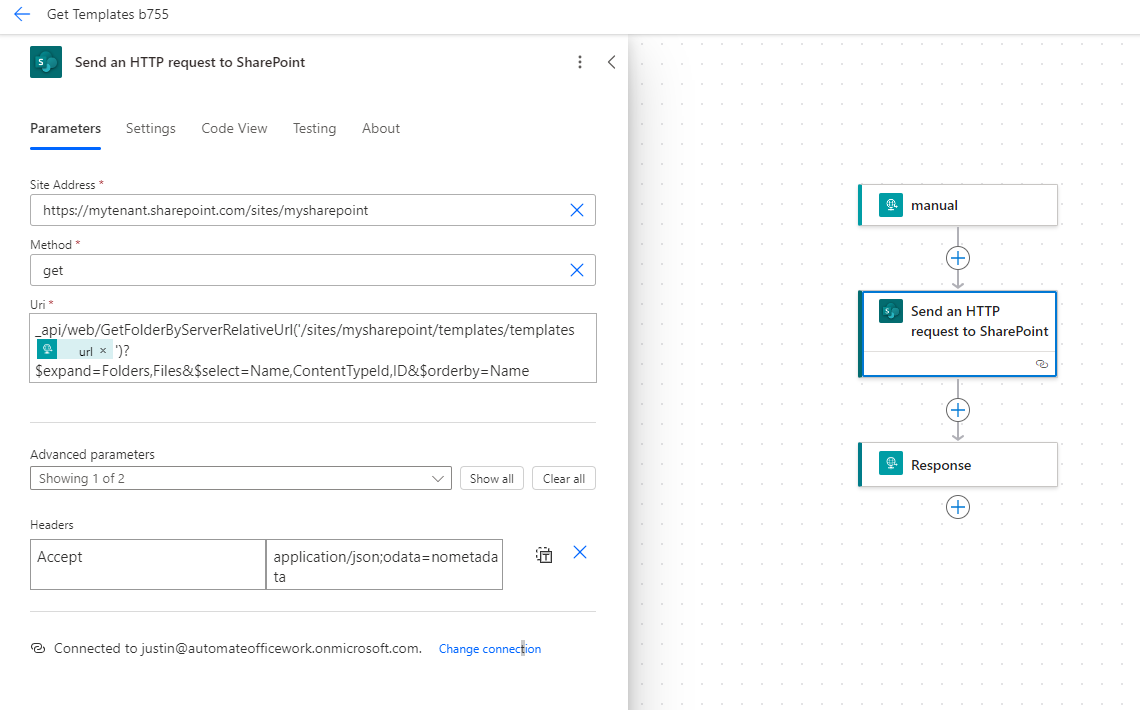
Next click on the middle step. This is the step that will reach out to your SharePoint and return a list of folders and files at the current URL. You will need to replace the URL to your actual SharePoint in the Site Address text field. Replace "mytenant" and "mysharepoint". Next in the Uri text field after "ServerRelativeUrl" replace "mysharepoint/templates/templates" with your actual SharePoint, possible daughter SharePoint, and document library. You should see your own account listed as the connection at the bottom instead of mine. Click "Save" at the top right corner of your browser. If you did anything wrong, Power Automate will show you errors that you need to resolve.
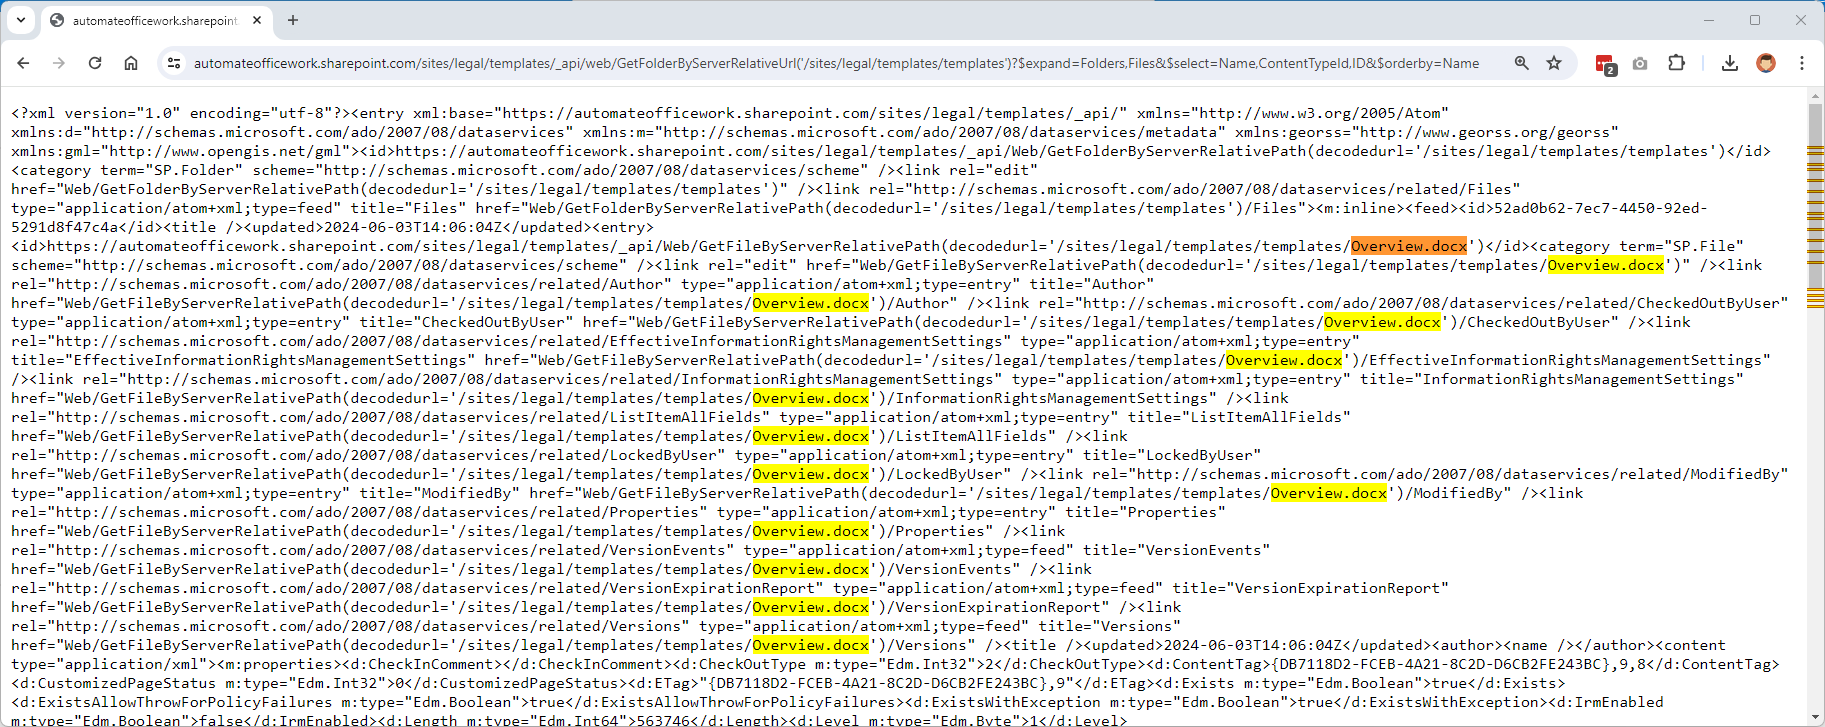
If you wish to check that the URL you put into step #2 is correct, you can open a browser and go to a URL like: https://automateofficework.sharepoint.com/sites/legal/templates/_api/web/GetFolderByServerRelativeUrl('/sites/legal/templates/templates')?$expand=Folders,Files&$select=Name,ContentTypeId,ID&$orderby=Name. Power Automate only needed the portion starting with _api, but the browser needs the entire URL. Here we are going to the root of our Templates document library and asking for it to return all the data about all the folders and files there. You can see in the screen shot that we are getting data back, including about our Word document Overview.docx. So we are successfully using the correct URL.
The last step in our Power Automate flow tells Power Automate to take the data received from SharePoint and to send it to the machine that requested the triggering URL. We cannot test the triggering URL in a browser because we have the URL variable that needs to be passed as a POST variable. Browsers can only pass GET variables and thus we cannot call the URL in a browser directly. Our Outlook add-in will pass the POST variable through an AJAX call.
On a Public facing Server
Next we will set up the server so our Outlook add-in can communicate with it. Outlook add-ins require the code for them be on a public facing server. You will need to set up an Azure server or any other server for this. We cannot simply place the code on SharePoint since SharePoint is closed and private.
I am using my own server at automateofficework.com for this which has PHP installed. I will use PHP to allow for Cross-origin resource sharing (CORS). So my index.html file will be called index.php so I can use PHP to do this. Create a folder on your server and place the files in the "publicfacingserver" folder. I will be using "automateofficework.com/outlook" as my demo location, but you need to substitute your own actual location.
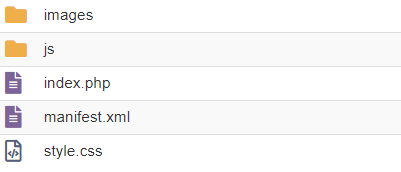
You should have the above folders and files on your server.
manifest.xml
Open manifest.xml and edit it. This file describe to Outlook how to show it as a button, the properties of your add-in and the location of the index.html file to start your add-in. Everywhere you see https://automateofficework.com/outlook you should substitute your own URL. There are approximately 16 URL's that need to be updated. Most of them are pointing to icons to use on Outlook buttons, but there are a couple places pointing to the index.html file to start the add-in. Look for the title "Contract Templates" and change it to whatever you want your button labeled. Save a copy of manifest.xml to your computer to use later.
index.html

You can see the PHP code I included at the top to allow for Cross-origin resource sharing (CORS) on my own server. If you do not need this, then you can remove everything on line 1 and rename the file to index.html to not use PHP. You'll need to update the 10 URL's pointing to automateofficework.com and point them to your own server.
There are 5 links in the bottom menu that you need to update links for. These are to View on SharePoint, View all templates, Learn more, Access and edits, and Email feedback.
The View on SharePoint should point to your Internal document library that you created that contains the default.aspx page and a folder called "Overview" that contains a default.aspx page.
The View all templates link then points to your Overview folder mentioned above. This page will show your entire tree of folders with all files visible at once.
The Learn more link should point to a Docx document in the root folder of your library. If you have not created this training document yet, go to your SharePoint that contains all the templates and create a new Docx document there in SharePoint. Then right click on the document and share it. This creates a unique URL. Copy this URL and paste it into the index.html page for the Learn more link. Now when your users click on "Learn more" it will open this Word document for them to read. You can edit this document to create a training for your users.
The Access and edits link should point directly to your Templates document library. Users clicking on this will open up SharePoint with the normal UI and can make direct edits to the templates which they have edit rights for or they can change permission rights if they are an owner.
Lastly, the Email feedback link should contain the email address of an admin who can receive feedback by email for this tool. Replace "contact@automateofficework.com" with your own email address.
javascript.js
Inside the JS folder is a file javascript.js. You'll need to replace the automateofficework.com URL's with your own. Around line 31 is a "getfiles()" function. This is where we call out to the URL that Power Automate created for you to get a list of folders and files at the current location. Inside the AJAX call is a variable called URL. After the colon (:) and between the apostrophes (") put your own URL that Power Automate generated for you previously.
Adding the Outlook Add-In
Now to add the button to Outlook. Go to https://aka.ms/olksideload. You will be re-directed to https://outlook.office365.com/mail and you'll get a pop-up to manage Outlook add-ins. Click on "My add-in" in the left navigation. In the Custom Addins section click on "Add a custom add-in". Select "Add from file...". Upload the manifest.xml file you edited and saved to your computer earlier. Say OK to the warning.
You should now have the Templates button wherever you use Outlook once you open an email. In the browser and phone versions of Outlook, there will be three dots in the top right corner of an email that you click on and you see a menu that includes the Templates add-in.