


HTML
This is the first in a three-part series covering the basic building blocks of web pages: HTML, CSS, and JavaScript. Learn about CSS next.
This lesson on HTML is meant for people who need a really fast lesson only covering the basics of HTML. It is not all comprehensive, but instead gives you only the basics that you need to get started working with it. Any kinds of tools made today to get the widest audience will need to presented inside web pages or apps. Thus you should know some HTML. Plus a lot of information we consume today is through existing web pages. Knowing how web pages basically work will help you in designing tools that automate managing data from the web.
HTML. Stands for HyperText Markup Language. It's a set of tags that you add to a document to describe the text. And it does so much more.
HTML was created as a way to organize documents on the Internet and to tell the browser how to display documents.
Today, HTML has become so much more. It is the structure of information on the Internet to make it readable by human beings.
It's now how we interact with the digital world. HTML has had such a profound impact that it now acts as the foundation for app development. If you want to reach an audience you need to go to them on the Internet. And if you want people to be able to consume and interact with your content, they will do so through HTML.

Sample HTML
We will be talking about three technologies that come together to make up the vast majority of most web pages: HTML, CSS, and JavaScript.
HTML is like the foundation and structure of a house. It defines the different rooms that exist and their general relationship to each other. In future lessons, you'll see how CSS is how we paint and decorate the house, and JavaScript is the doorknobs and light switches that allow your user to interact with it.
But for now, let's talk about the foundation and structure of the house.
HTML is a set of tags that wraps around all your pieces of content. The tags nest inside other tags like children under parent tags. If we follow the house example, we could describe a house using the following tags:
<house>
    <floor>
        <room></room>
        <room></room>
    </floor>
    <floor>
        <room></room>
        <room></room>
        <room></room>
        <room></room>
    </floor>
    <floor>
        <room></room>
        <room></room>
        <room></room>
        <room></room>
    <floor>
</house>
We have a single house that contains three floors. Each floor contains various rooms. We can describe each of these elements further by adding various properties with values to each element.
<house address="123 Main Street">
    <floor level="attic">
        <room id="laundry">
            <items>
                <item>Washing machine</item>
                <item>Dryer</item>
            </items>
        </room>
        <room id="office"></room>
    </floor>
    <floor level="second">
        <room id="bedroom 1"></room>
        <room id="bedroom 2"></room>
        <room id="master bedroom"></room>
        <room id="bathroom"></room>
    </floor>
    <floor level="first">
        <room id="kitchen"></room>
        <room id="living room"></room>
        <room id="guest bathroom"></room>
        <room id="closet"></room>
    <floor>
</house>
We have added various properties with values to each element. Inside the laundry room I added a list of items and each item contains text describing the item. If we extended this list to items in each room, we would have not only a list of all items in the house, but we would also know their relationships to each other. We could display this information to anyone in a convenient, useful way. This is what HTML does. And it's only the beginning.
A document can be described in the same way, containing chapters which contain paragraphs which contain sentences. Perhaps an occasional graphic with a caption.
The main tag wrapped around an HTML document is the
<html> tag. At the very end we close this with a corresponding </html> tag. Inside the <html> tag are two main sections: <head></head> and <body</body>.The
<head> section contains all kinds of information about the document that is not actual content. For example, you can tell the browser the language of the document, the author, the title that should appear in the browser tab that is open, the small icon that should appear in the browser tab, perhaps some other helpful meta data to help Google index the page better. This is also where we will be either referring to our CSS and JavaScript or putting the bulk of them directly into the document here.The
<body></body> is then where we start putting the content that will appear in our web page.You can already start creating your first web page. Create a new file on your desktop called myfirstpage.html. If you open this page directly in a browser it will be blank. Open the file in notepad. And copy and paste the below cole.
<html>
    <head>
        <title>My first page</title>
    </head>
    <body>
        This is my first page
    </body>
</html>
Save your file in notepad and refresh the web page in the browser to see your first web page. The browser doesn't care if your tabs and spaces are not indented properly. In fact, the browser actually doesn't care about tabs and extra spaces. In fact, if you make a double space or enter onto a new line to start typing more text, the browser will ignore all of these, because these things should be indicated with HTML elements.
Don't worry too much about making mistakes in HTML. Browsers are actually really forgiving. They will not throw errors but will try really hard to correctly show the page as you intended. So if you forget to close a tag, the browser might just close the tag for you where it thinks the closing tag should go. The worst that can happen is that your page won't look exactly as you inteded it to look.
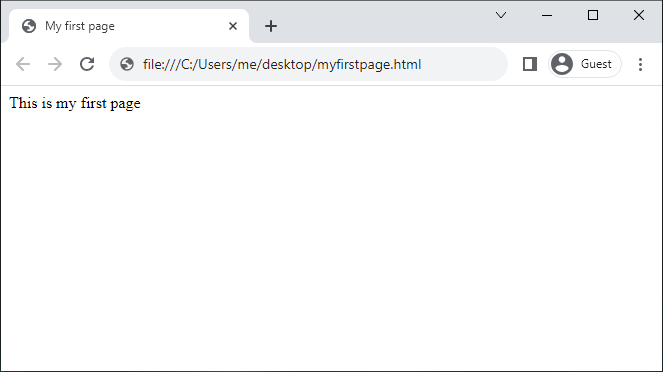
Congratulations! You have created your first web page. With a title in the browser tab and the words "This is my first page" on a white back ground.
There are two main tags that you will constantly seer inside the
<body></body> section. These are <div></div> and <span></span>. They are similar, but also opposites in some regards. They are both used to wrap around content.<div></div> is used for a box-like section that takes the entire width of its parent. If you put two <div> elements one after the other one will stack on top of each other.<div>
DIV 1
</div>
<div>
DIV 2
</div>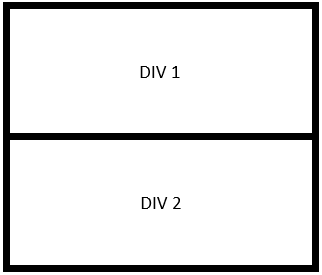
<div> elements take up the entire width of their parent and stack on top of each other by default when there are two sibling <div> elements. NOTE: Borders shown for convenience. Borders are not shown by default in HTML <div> elements.
<div> elements can be nested like so:<div>
<div>NESTED DIV 1</div>
<div>NESTED DIV 2</div>
</div>
<div>
DIV 3
</div>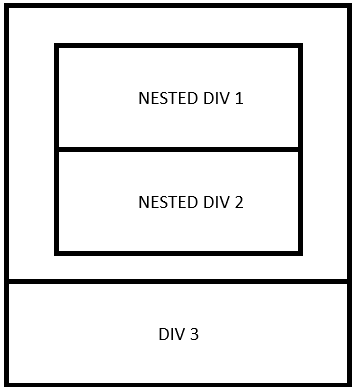
A
<span></span> element wraps around content that is meant to continue with the flow of other content before and after it. Think of it like a sentence in the middle of a paragraph. It does not break out with line breaks before and after it, but continues in the same line. <span> elements are described as being "inline" and <div> elements are described as being "block" elements.<div>
<span>This is sentence 1.</span>
<span>This is sentence 2.</span>
<span>This is sentence 3.</span>
</div>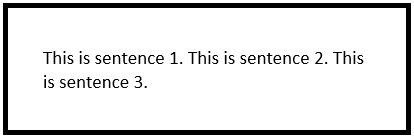
<span> elements continue inline with other content around them. They do not have line breaks before and after them. <span> elements are broken into new lines in the middle of their own content when its parent or the window is too narrow to display all of its content.
The
<p></p> is paragraph level content, usually text. It is a block element with a line break before and after it.Images are placed in a web page with the
<img src="url to the image goes here" /> element. Images are customized with CSS. Images are inline with other content by default.Links are what really made the early World Wide Web powerful. Being able to click on text to go to another web page. The tag to do this is
<a href="URL to the new page">Text to be clicked on goes between the tags</a>. A link should only go around inline content. Not block content. A link can wrap around an image. But not around a <div> element.There is a set of tags that describe a table with columns and rows. A table two rows by two columns is shown below.
<table>
    <tr>
        <td>top left</td>
        <td>top right</td>
    </tr>
    <tr>
        <td>bottom left</td>
        <td>bottom right</td>
    </tr>
</table>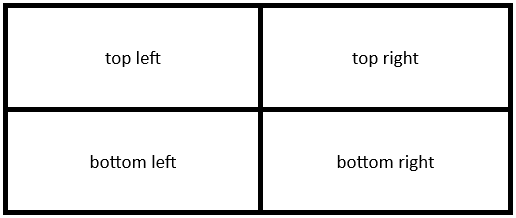
<tr></tr> is a table row. <td></td> is a table cell.We can remove the top right cell and apply the property "colspan" to the top left cell with a value of 2. This makes this cell stretch across two columns.
<table>
    <tr>
        <td colspan="2">top left</td>
    </tr>
    <tr>
        <td>bottom left</td>
        <td>bottom right</td>
    </tr>
</table>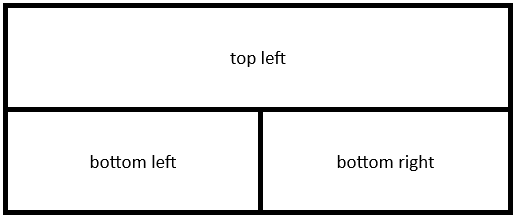
We can do something similar and remove the bottom left cell and apply the property "rowspan" to the top left cell with a value of 2. This makes this cell stretch across two rows.
<table>
    <tr>
        <td rowspan="2">top left</td>
        <td>top right</td>
    </tr>
    <tr>
        <td>bottom right</td>
    </tr>
</table>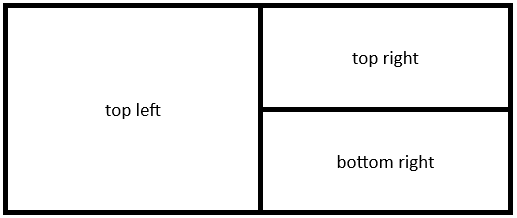
It is preferred in the HTML community to only use tables when you are displaying data that needs to be in a tabular format. You should not be using tables to create columns of paragraphs or to make your page look a certain way for style. This was done in the early days of HTML to give a certain look to paragraphs in web pages. The HTML community now prefers to create tables for stylized content by using nested
<div></div> elements with CSS applied to create rows and columns. We will go over this in the CSS lesson. You may still see many people using tables to style the look of their content.There are more tags related to tables that you may see, like:
<tbody>, <th>, <caption>, <colgroup>, <thead>, and <tfoot>. But these are the main table tags that you will see and need to be able to use.Lists of items have their own special tags. If you want simply a bulleted list you will use the
<ul></ul> for an unordered list. List items in the list are wrapped with <li></li>. If you want a numbered list, then this is called an ordered list and it uses the element <ol></ol>.<ol>
<li>Red</li>
<li>Green</li>
<li>Blue</li>
</ol>
<ul>
<li>Apple</li>
<li>Orange</li>
<li>Banana</li>
</ul>
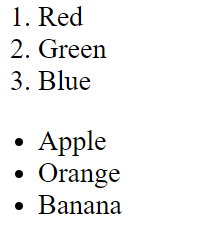
Unordered and ordered lists are block elements. They have a line break before and after them. Individual list items are also block elements.
Lists can be nested as deep as you want. The result is that indentation is added to the different levels. You can mix numbers and bullets.
<ol>
    <li>Red
        <ul>
            <li>Apple</li>
            <li>Strawberry</li>
            <li>Watermelon</li>
        </ul>
    </li>
    <li>Green
        <ul>
            <li>Pear</li>
            <li>Melon</li>
            <li>Grapes</li>
        </ul>
    </li>
    <li>Blue
        <ul>
            <li>Blueberries</li>
        </ul>
    </li>
</ol>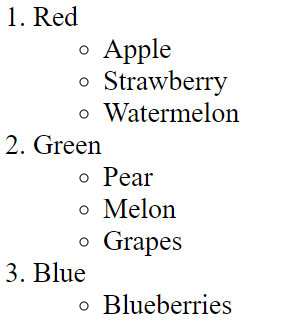
You can customize the numbers shown for ordered lists.
<ol reversed="reversed"> reverses the order of numbers. <ol start="3"> starts with the number 3. And <ol type> can be set to 1, A, a, I, or i for all kinds of numbers, upper and lowercase letters or even upper and lower case i's for Roman numerals.For an unordered list, the bullet can be customized to a different symbol, but this is done with CSS.
The
<br /> creates a line break. It forces elements that would otherwise remain all in a line to go down to the next line. Notice this tag cannot wrap around other content so there is no corresponding closing tag. It is a self-closing tag.There are several form elements that you can put on your page that your user can interact with.
<textarea placeholder="User will see this text when the text area is empty">This is a text area that the user can freely type inside. Text between the tags appears in the textarea by default. If instead you want the user to only see helpful text when the text area is empty, you would apply the property "placeholder" and give it a value of the text the user should see when the text area is empty. A text area can have multiple lines and a scrollbar when needed.<textarea>
<br /><br />
<button>This is a button to click</button>
<br /><br />
<input type="text" value="A text input does not allow line breaks. For shorter text." />
<br /><br />
<input type="number" value="5" min="1" max="9" step="2" />
<br /><br />
<input type="date" />
<br /><br />
<input type="checkbox" checked />
<br /><br />
<input type="radio" name="groupA" />Option 1
<br />
<input type="radio" name="groupA" checked />Option 2
<br /><br />
<select>
        <option>Option 1</option>
        <option selected>Option 2</option>
</select>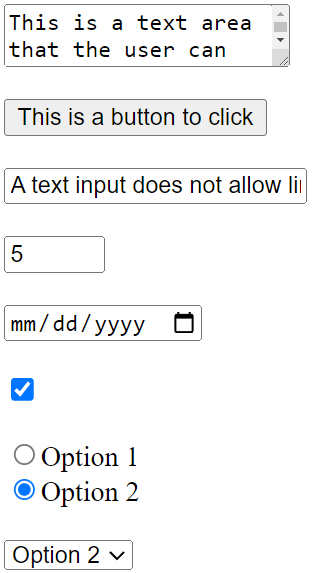
Most of the HTML form elements you will encounter
One final HTML element that you might find often is a horizontal line called the horizontal rule. The
<hr /> simply creates a horizontal line across the page. It is a block element so there is a line break before and after it. CSS can be used to customize it.These are most of the HTML tags that make up the majority of what you see in web pages. There are some uncommon tags or tags that are used for specific niches. There are also new HTML tags that are added from time to time. The World Wide Web Consortium (W3C) takes suggestions for new tags and determines the standards for HTML. HTML 5.0 was released in 2014 and includes special tags for things like
<audio> <video>You might also see a tag called
<iframe></iframe>. This was used in the past essentially to put another web page inside your web page. It is no longer used in modern HTML, but you might come into contact with it.Besides HTML elements, there are also things called HTML entities. These are special codes to show symbols.
< = <
> = >
& = &
= (This creates multiple spaces since HTML igores multiple spaces otherwise.
© = ©
™ = ™
¢ = ¢
' = '
¶ = ¶
§ = §
℃ = ℃
★ = ★
⚐ = ⚐
> = >
& = &
= (This creates multiple spaces since HTML igores multiple spaces otherwise.
© = ©
™ = ™
¢ = ¢
' = '
¶ = ¶
§ = §
℃ = ℃
★ = ★
⚐ = ⚐
If you need to show a symbol and you don't want to use a full image, chances are good that an HTML entity could do the job for you. There are tens of thousands of HTML entities if you know how to describe what you're looking for.
You can view the HTML that makes up any web page. Go to the page in your browser. Right click anywhere on the page and click "View source" or "Inspect". View source opens a new tab with the HTML visible. Opening inspect opens the developer panel on the right side of your screen. Select the "Elements" tab and you can see the HTML tree of elements. You may need to expand these to make child elements visible. In this mode you can often hover over an HTML element in the panel and the element will become highlighted in the normal area of the browser where you view the contents of the normal web page. Both areas to view the HTML are a great way to get to know how HTML works. If you see something you like in a web page you can easily go see how they did it.
This is the first in a three-part series covering the basic building blocks of web pages: HTML, CSS, and JavaScript. Learn about CSS next.